1. Space Planning:
Design the layout for optimal flow, visibility, and accessibility.
2. Anatomy Models:
Choose models that allow students to visualize different body systems and structures.
3. Delivery Models:
Models should simulate normal and complicated deliveries for comprehensive training.
4. Community Bags:
Include tools for teaching about nutrition, hygiene, vaccinations, and health assessments
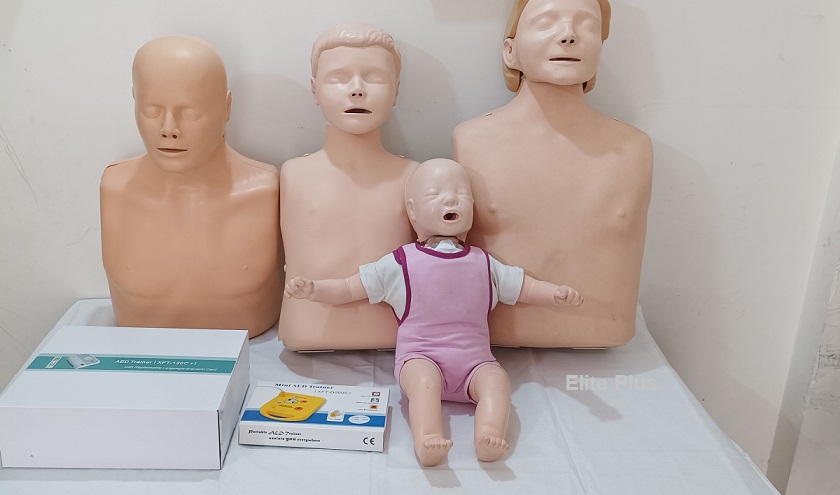
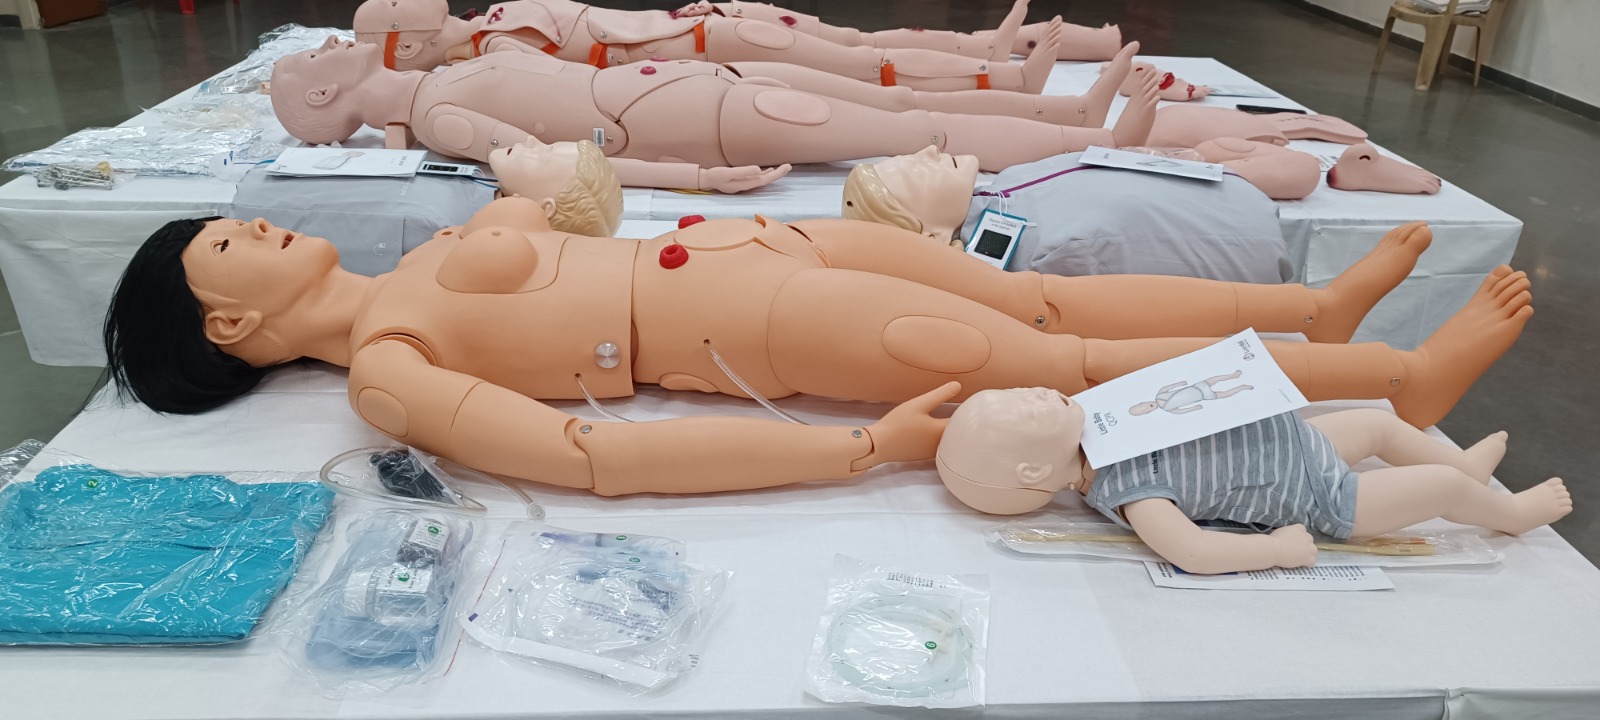
5. Nursing Manikins:
Manikins should be capable of simulating a variety of health conditions and clinical scenarios.
6. Skill Stations and Equipment:
• Wound Care Station: Provide wound care supplies, dressings, and manikins for practicing wound assessment and care.
• Medication Administration Station: Include medication carts, simulated medications, and administration tools for safe practice.
• Basic Nursing Skills Station: Set up areas for practicing patient hygiene, positioning, and mobility assistance.
Setting Up a Midwifery and Child Health Nursing Lab
A Midwifery and Child Health Nursing Lab is a specialized space where students learn and practice essential skills related to childbirth, maternal care, and pediatric nursing. This lab focuses on developing the expertise needed to provide optimal care to mothers and newborns. Here’s a comprehensive guide to setting up a Midwifery and Child Health Nursing Lab:
1. Birthing and Maternity Stations:
• Include maternal care stations for postpartum assessments, breastfeeding support, and maternal health education.
2. Neonatal Care Stations:
• Set up stations for neonatal resuscitation training using specialized manikins.
3. Maternal and Child Health Education Area:
Use multimedia resources, models, and posters to enhance education.
4. Simulation Manikins:
• Manikins should replicate physiological responses and complications for comprehensive training.
5. Obstetric and Pediatric Equipment:
• Pediatric Equipment: Provide infant scales, growth charts, and pediatric assessment tools for practicing pediatric assessments.
6. Skill Stations and Supplies:
• Newborn Assessment Station: Provide equipment for newborn assessments, including weight, length, and vital sign measurements.
• Maternal Care Supplies: Include postpartum care supplies like perineal pads, hygiene items, and comfort measures.
Setting Up a Community Health Nursing Lab
A Community Health Nursing Lab is a specialized training space that focuses on preparing nursing students for community-based healthcare practice. This lab helps students develop skills in promoting health, preventing disease, and providing care within various community settings. Here’s a comprehensive guide to setting up a Community Health Nursing Lab:
Skill Stations and Equipment:
• Immunization Station: Equip with syringes, needles, and simulated vaccines for practicing safe and effective immunization techniques.
• Home Visit Station: Create a simulated home environment where students can practice assessing patients in their own homes.
• Community Assessment Station: Provide tools for conducting community assessments, including maps, surveys, and data collection instruments.
Simulation Tools:
• Incorporate standardized patients or actors to enhance realism in communication practice.
Setting Up a Pre-Clinical Science Lab or Anatomy Lab
A Pre-Clinical Science Lab or Anatomy Lab is a dedicated space for students to learn and explore the intricacies of human anatomy and physiology through hands-on dissections and practical exercises. It provides an essential foundation for students pursuing careers in healthcare, medicine, biology, and related fields. Here’s a comprehensive guide to setting up such a lab:
1 Anatomy Stations and Equipment:
• Skeleton Models: Display articulated skeleton models for studying bone structure and landmarks.
• Organ Models: Include anatomical models of organs and systems for visual and tactile learning.
2. Specimens and Preservation:
Ensure proper storage and preservation methods to maintain specimen quality.
3 Anatomy Software and Resources:
Use interactive apps, 3D models, and virtual dissection tools.
4 Audio-Visual Aids:
Use audio systems for clear communication during demonstrations and instructional sessions.
5. Safety and Ethical Considerations:
Foster an environment of respect and professionalism towards donors and the study of human anatomy.
6 Lab Attire and Personal Protective Equipment:
7. Certified Instructors:
Instructors should provide guidance, oversee procedures, and offer educational insights.
8 Debriefing Area:
9 Interactive Workshops:
A well-designed Pre-Clinical Science Lab or Anatomy Lab offers an immersive learning experience that helps students develop a deep understanding of human anatomy and physiology. By providing a combination of practical dissections, digital tools, and interactive resources, you contribute to the education of future healthcare professionals who will make a positive impact on patient care and medical research.